
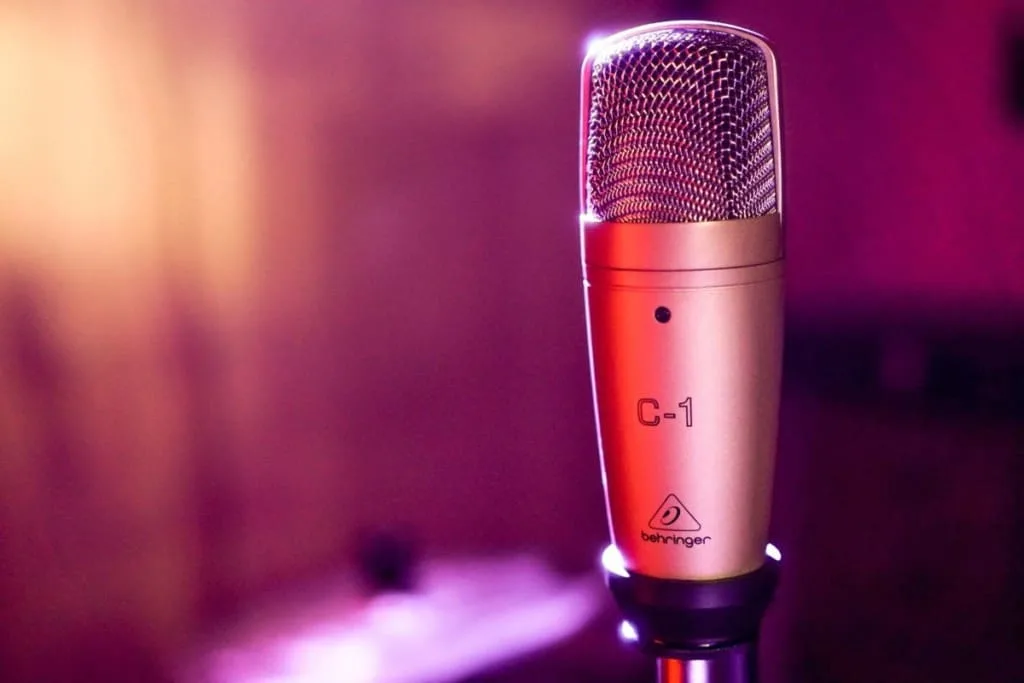
If you close your eyes and I say the word “condenser microphone” you’ll very likely picture something similar to a Samson C-01 or another with the same quintessential shape.
Not everybody is familiar with the smaller siblings of large-diaphragm condenser microphones. Indeed it is shocking for me to go to a colleague’s studio and ask for them to find only a pair of shrugging shoulders as an answer. This usually comes accompanied by “use a large-diaphragm one, they sound the same”. That is why I decided to put this post together and shed some light on this important matter.
What’s the difference between a large and small Condenser Microphone?
As a general rule, large and small condenser microphones differ in the size of the enclosure to fit different capsules. This difference in space has a big impact on how each microphone captures the low and high frequencies.
Small-diaphragm condenser microphones are great to capture brightness while large-diaphragms are great for warmth. Whilst large-diaphragm condenser microphones are close to a one-for-all microphone, small-diaphragm condensers are more specific in their use.
That was the short answer but if you truly want to master the use of these microphones you have to keep on reading. Let me show you the wonderful world of small-diaphragm condensers.

Large vs Small-Diaphragm Condenser Microphones; What Are the Common Points?
Let’s begin with what these microphones have in common. Indeed, both belong to a family of microphones called “condensers”, but what else do they share?
· Sound capturing method – Most condenser microphones in the world share the same inner structure. Despite the fact that the outside of both microphones differs drastically, the guts of them are quite similar.
· Phantom power – This is a question that I get asked a lot and I always respond with the same golden rule: all condenser microphones need phantom power (including small-diaphragm ones). You can find an article that shows you how to set up any microphone with phantom power here.
· Careful handling – There are two things that are not recommended for condenser microphones, which are rough handling, and extremely loud sound sources. While small-diaphragm condensers are a little tougher, none resembles a dynamic neither in the frequency range, the SPL tolerance (more on this later), or the durability.
Large vs Small-Diaphragm Condenser Microphones What Are The Differences?
Now that we’ve seen a little about what they share in structure, it is time to see which the differences are.
Sound Isolation
This is one of the main reasons I have a hard time understanding why small-diaphragm condensers or “pencil” microphones are so underrated.
The isolation level you get from a small-diaphragm when you are pointing it to a sound source from close is superb; in fact, to my ears, it does match that of a dynamic (only with a higher sensitivity). I have been in rooms with more than a dozen classic instruments and got amazing results using a pencil microphone for each.
Putting even a single large-diaphragm condenser in the same scenario would have created a sound mess very difficult to clean up.
Lower Frequencies
For those not so well-versed into the recording world, this is, perhaps, the most easily audible difference between large and small-diaphragm condensers. Because of how they are built, large-diaphragm condensers can capture the lower frequencies in a more harmonically-beautiful way. The result is a rounder sound that you can use to sit in the center of the mix loud, fat, and proud.
On the other hand, pencil microphones (small condensers) cannot capture these frequencies and you will find them “lacking” on more than one scenario.
Higher Frequencies
In the higher frequencies, and also because of the way each microphone is built, you’ll find that the results are inverted.
Small-diaphragm condenser microphones indeed shine when you talk about higher frequencies. They can capture that chime without turning shrill, or annoying. Since the frequency spectrum is shorter, you´ll have to work less on your EQ to obtain a great result because the unwanted low frequencies will not be there, to begin with.
On the other hand, large-diaphragm condensers will capture the entire frequency spectrum (well, most of it at least) including the low end. This can take you to a lot of tweaking to get to a similar result.
For a cool video of an acoustic guitar next to small and large-diaphragm condensers, you can check this video out. I suggest you use your studio headphones for a better result.
The Golden Rule Of Sound Pressure Levels
Are you familiar with what sound pressure levels are?
Roughly speaking, it measures the intensity with which a sound wave hits the capsule. This makes a very big difference because you can either create distortion on the take or even damage the microphone. Believe me, I was there when Terry, a friend of mine, destroyed an old Behringer B-1 trying to play Pantera’s “Walk” in his cranked full-stack in his basement. He blasted this large-diaphragm condenser so badly that the membrane couldn’t take it. The microphone was ruined for good.
A small-diaphragm condenser by design can take SPL (Sound Pressure Levels) better than large-diaphragm condensers. This is simply because the capsule is deeper inside and more protected by the carcass of the microphone. That being said, the golden rule of sound pressure levels is: to use a dynamic microphone (ideally an SM57 for my buddy Terry) when the source is loud (snares, guitar amps etc) and a condenser when the source is quieter (acoustic guitars, vocals).
- Check out my article on Dynamic vs Condenser microphones when recording ASMR. You can find it here.
Overhead Small Diaphragm Microphones
This is my first suggestion; small-diaphragm condensers make amazing overhead mics.
You might wonder why; the answer is very simple: because you need only to capture the brightness and the super-high frequencies of cymbals with none of the banging on the toms. Although this is the case, some audio engineers are starting to use large-diaphragm condensers on top to also capture the rest of the kit and use it for the mix.
You can see an explanation about it in this video.
Large Vs Small Condenser Microphones And Acoustic Guitars
I’m going to start this item by saying: depends on the role of the instrument in the song. I have worked with many different artists in my life and have been lucky enough to experience the change in the acoustic guitar sound over the last couple of decades.
What happened was that the role of synthesizers displaced the role of the guitars in productions. This means that the mid-lows no longer come from that wooden cavity, but from other (many times virtual) instruments in the mix.
- Recording a large guitar track to sit in the middle of the mix requires a large-diaphragm condenser.
You can check this video on how to record a live acoustic with just one microphone.
On the other hand, recording a guitar that will accompany the track can benefit largely from a close-position small-diaphragm condenser to capture all the brightness. You won’t have to equalize it so much.
Choosing Gear Can Be Really Hard!
Home recording requires a whole series of equipment, and it can be difficult to do the research to figure out exactly what to buy depending upon your budget.
I have written a complete guide to exactly which equipment you should get depending on your budget.
Large Vs Small Condenser Microphones Recording Vocals
Last, but definitely not least; let’s talk vocals. The question that triggered this section was one I got a short time ago.
We were demoing high-end large-diaphragm condensers and the singer in the band asked me “Is coloration a synonym for attitude?” from the recording booth. That struck me as a no-brainer and I just answered “No” through the intercom.
A couple of days later though, I got to really think about the meaning of his question and came to the idea that coloration might not always be a good friend. Some singers have indeed a different tone that requires transparency and that is something you can only get by using a microphone to capture uncolored sound. This is exactly where small condensers come in.
I want to share a secret technique with you that I have been doing ever since with great results. What I do is get one take on, for example, my Lewitt LCT 40 and then blend it in with either a Lewitt LCT 540 or the fancy Neumann U87. The result is added transparency to the final result because of the brightness and uncolored performance of the pencil microphone.
This video is quite an odd endeavor named “Mic Wars” but it is good to illustrate the clarity of pencil microphones, even when we are talking about inexpensive C-2 vs a B-2.
Large vs Small Condenser Microphones- The Verdict
I know what you were expecting: to reach the end of the article and have me tell you what to buy. Well, I am terribly sorry to disappoint you because my answer is going to be “you should have both”.
A popular all-round choice for a solid condenser microphone to get started with is the Audio Technica AT2020
If you are just starting, taking your first steps, and need a one-for-all microphone go and buy a large-diaphragm condenser and you can add a small-diaphragm one down the way. It is better to have a single microphone that’s capable of covering the entire frequency spectrum to start working.
If you already have some experience and a microphone or two in your arsenal, I would say that you can always benefit from adding a new microphone to the collection.
Start small, get an inexpensive, entry-level small-diaphragm condenser, and learn microphone placing with it. Your ears will tell you when it is the right moment to move on to the next leagues; the same thing happens with a large-diaphragm condenser.
Remember that every tool you add to your set can potentially make your recordings better, more textured, and interesting. A small-diaphragm can certainly open the door to new sounds to add to the palette and keep painting.
Let me finish up leaving you this video of three wonderful studio uses for a small-diaphragm condenser.
Don’t forget “grow your ear before your gear”
Happy recording!