When the technology boom happened, computers and digital interfaces became popular. As a result, MIDI became necessary so that the music industry could translate music notes into readable data for digital use.
So, what is MIDI?
The word MIDI stands for “Musical Instrument Digital Interface.” It’s a set of binary data that illustrate musical parameters such as pitch, dynamics, and tempo, As a general rule MIDI converts musical notes into digital data that can be processed by computer programs or electronic devices. When the data is played, it triggers the sound of the musical note.
MIDI has become widespread and can be found on almost any track of music these days. So, if you’re a musician or want to start recording, you’ll need to understand what MIDI is and how it works. This guide will cover all the topics that any beginner should know.
Why MIDI?
MIDI was first invented to allow musicians to control multiple electronic instruments using a single keyboard. That way, they could create various sounds from different instruments at the same time.
Before MIDI came along, musicians had to play multiple instruments and go through endless recording until they got it just right. Sometimes this would take days, even weeks. With MIDI, it’s much easier to control the sounds and make adjustments on an interface.
After a while, people realized that MIDI files are smaller than digital audio files, which means computers could process them faster with minimal issues. Now users can record at home instead of spending hundreds of dollars (if not thousands) at a professional recording studio.
The best part is you can get away with sounding like a pro. All it takes is a few clicks to edit your music data. So, if you are new to music and not super confident in your instrument playing skills, you could use MIDI software to make it sound better.
How Does Midi Work?
MIDI is a form of language that computers and devices use to communicate music data. The language has a series of bits, which represent the binary digits that will pass through a MIDI cable or port. As you create music on your instrument, the interface converts the notes into digital data language, which can be read by an electronic device. In short, Midi is the controller for virtual instruments.
Typically, the MIDI device will transmit the binary data to an interface where you can process and edit the data. As you play back the data, it will create the same sounds you created on the instrument.
The data includes the following:
- The note you’re playing
- How hard you’re pressing the note
- How long you’re holding down the note
Since MIDI data is a universal standard, any music made with MIDI can be played on any electronic device. You can use different types of sequencers and software to create music with MIDI.
Take a look at this great video that should help you get started in the wonderful world of midi.
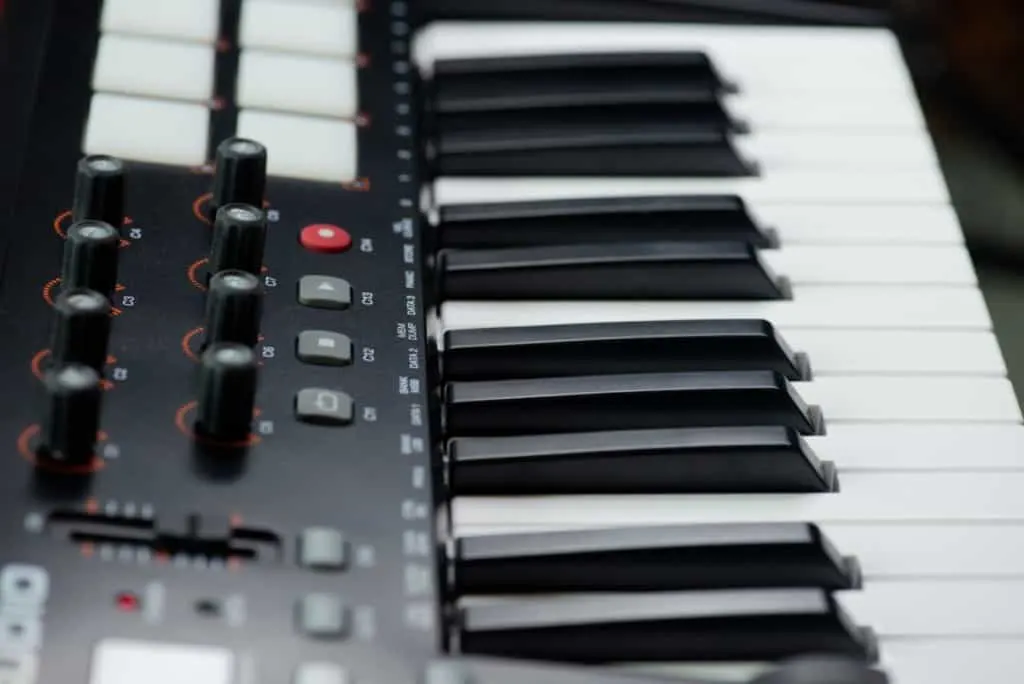
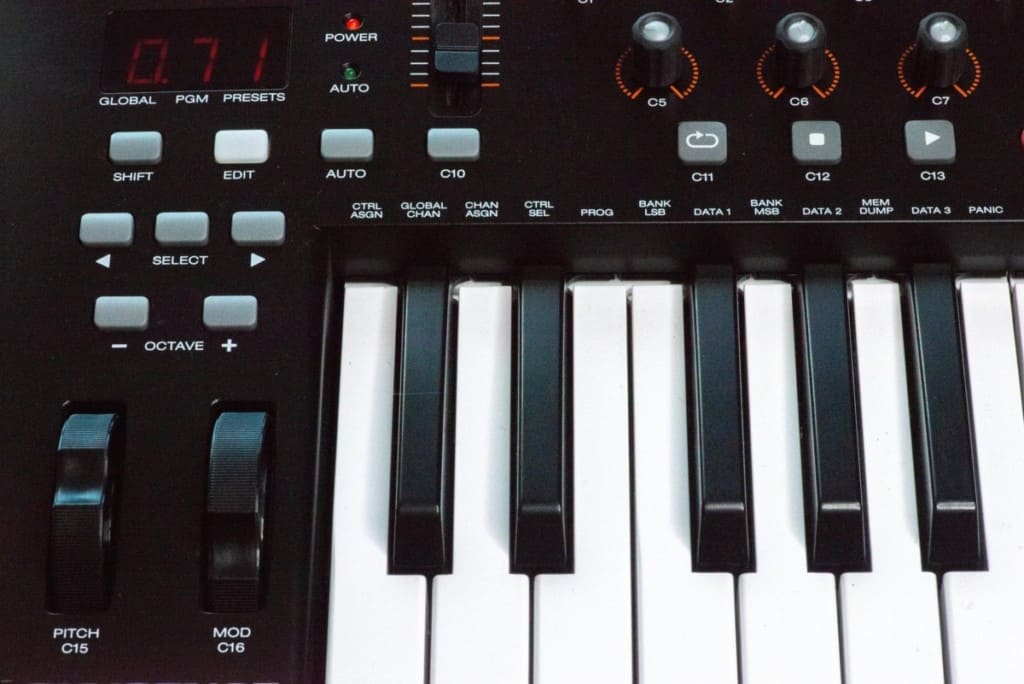
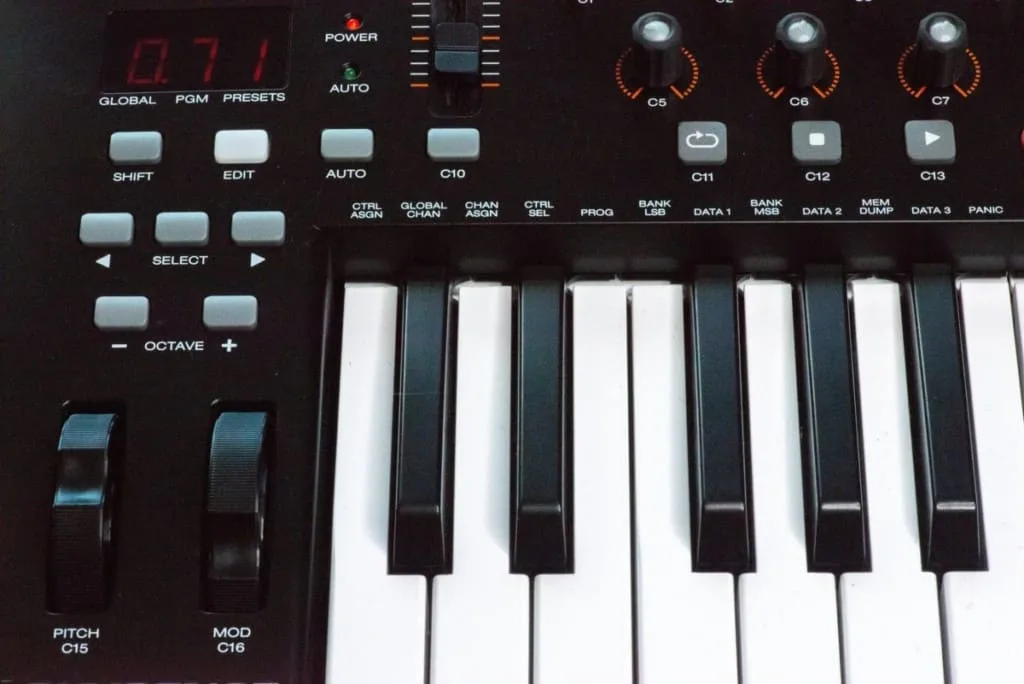
MIDI Keyboard Controllers
To use MIDI, you’ll need a controller. It’s a hardware that’s necessary to send and receive MIDI data. The first MIDI controller was a keyboard, and they’re still popular among musicians. Most experts will tell you to get a keyboard first to become familiar with MIDI.
Let’s look at some of the top picks for MIDI controller keyboards:
- Alesis Q25
- M Audio Oxyg
- Akai Professional MPK Mini MKIIl
- Korg NanoKey2 Nanopad
- Arturia Keylab Essential 61
Alesis Q
Alesis is a basic MIDI controller keyboard that is small and easy to use. It comes with pitch and mod wheels and a sustain pedal input. There is a USB port, as well as the traditional 5-pin MIDI port. This simple controller is ideal for beginners or new users who want to learn how to produce music.
M Audio Oxygen
A hybrid design that combines keyboard and percussion, so you won’t need two separate controllers. If you’re a musician who doesn’t want to mess around with MIDI mapping, this product would be a good fit because it automatically auto-maps the data to the DAW.
Akai Professional MPK Mini MKIIl
This controller was designed with mobility in mind for musicians “on the go.” The Akai Mini is small and compact with several handy features. For example, keys and pads are combined into one device, and it has onboard arpeggiators for synth musicians. It also comes with SONiVOX Wobble and Hybrid 3 software.
Korg Nanokey2 Nanopad
The Korg Nanopad is a unique controller with two small separate devices that work together. It has keys on one device and pads on the other. Its small size makes it easy to carry around in backpacks. The simple layout is also easy to use. The sustain button eliminates the need for a foot pedal.
Arturia Keylab Essential 61
The Arturia comes with multiple MIDI controls and features. What’s nice about this controller is the built-in Abelton Live integrated software. The software displays detailed information on the LED screen about each MIDI control and mapping. You can also play virtual instruments and synths on it.
Other MIDI Controllers
Over time, different MIDI controllers were invented to include various instruments and devices, even virtual ones (more on that later). As you become familiar with MIDI, you may want to play around with other types of controllers.

Let’s look at the top picks for different types of MIDI controllers:
- Akai Professional MPD218
- Suzuki 49-Key Digital Sound Guitar
- MeloAudio MIDI Commander Guitar Floor Multi-Effects Portable USB MIDI Foot Controller
- Yamaha SLG2000S Steel String Silent Guitar
Akai Professional MPD218
The Akai Professional is a pad controller with 16 pressure-sensitive pads. And they’re mainly used for creating drum beats and controlling virtual percussion instruments. The Akai is iOS compatible and has a plug-n-play USB feature.
Suzuki 49-Key Digital Sound Guitar
The Suzuki is considered one of the best MIDI guitars out there. It comes with a wide range of chord combinations and selections of rhythm styles. It has a futuristic appearance with several buttons and features. It has ports for attaching cables.
MeloAudio MIDI Commander Floor Multi-Effects Foot Controller
Like the name says, this MIDI controller can play multiple sounds while you press on it with your foot. It’s a small rectangular controller that you put on the floor and you can press on it while you play your guitar (or other instruments). Think of it as a special effects sound board.
Yamaha SLG200S Steel String Silent Guitar
What’s nice about this MIDI controller is the guitar-shaped wood design. It gives the controller a natural feel. You can use this controller on the go or on the stage. When you play the strings the sound data is sent to an interface. That’s why it’s called a silent guitar.
When choosing a MIDI guitar, it may be a good idea to get one that looks like a real guitar. That way, you can get used to playing on it. Some MIDI guitars come with tutorial programs that will help you learn how to play the chords.
MIDI Controller Features
MIDI controllers have several features. Some of them may seem simple with a few features, while others are more complex with many buttons and switches. The basic features usually include the following:
- Knobs and Faders
- MIDI Ports
- MIDI Cables
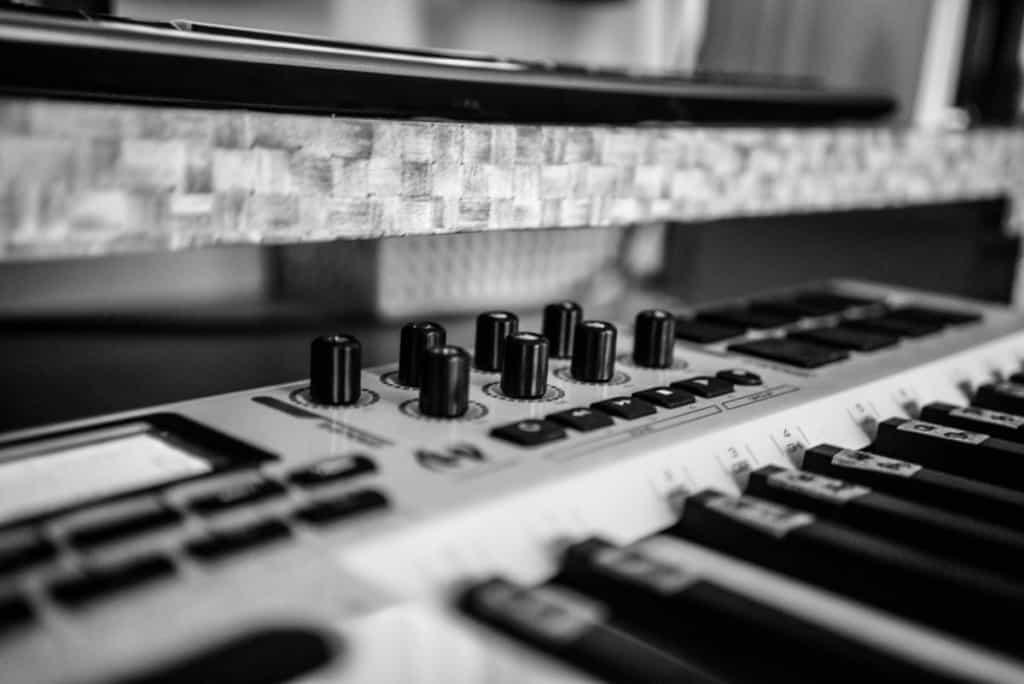
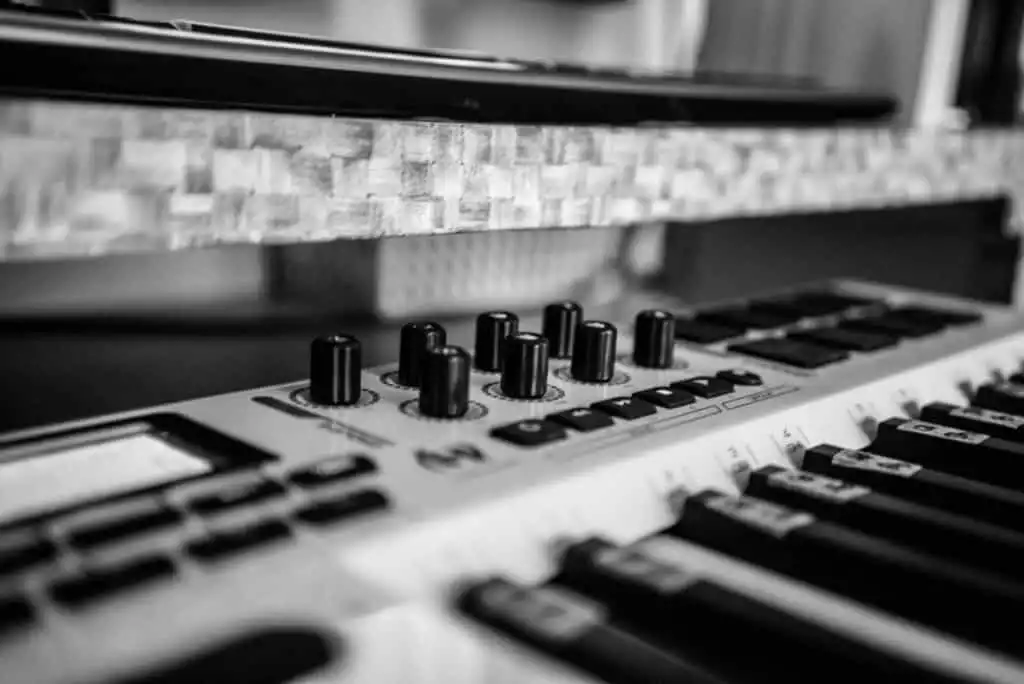
Knobs and Faders
Almost all MIDI controllers have a wide variety of knobs and faders (some have buttons too). They are used to adjust the sound. The placements of the knobs and faders depend on the brand and type of controller.
When digital synth music became popular, MIDI controllers were developed with fewer knobs and faders. Instead, they had a LED screen display. However, some users still preferred a hands-on approach. As a result, manufacturers developed synth controllers with more knobs and faders for an analog feel.
The functions of knobs and faders on MIDI controllers can be set with MIDI Mapping. The mapping process allows you to assign different functions to the buttons and knobs, so when you want to change a sound, all you have to do is move them.
MIDI Ports
You’ll need to connect your MIDI controller to an interface. This is usually done with ports and cables. MIDI ports allow the devices to send MIDI data in and out. The MIDI OUT port is for exporting the data, and the MIDI IN port is for receiving data. You’ll need to insert the cable into the ports. Most MIDI use USB ports these days, but some MIDI devices may have aux ports.
Check out this video on Midi ports.
Some devices may have a third one port, called the MIDI THRU port, which allows the device to copy the MIDI data and create strings of data that are identical. That way, MIDI devices can send or receive the same information. This will come in handy when you’re hooking up multiple MIDI devices.
Midi Cables
Since MIDI data differs from audio, traditional cables can’t be used to transmit the data. This is where MIDI cables come into play. There are different types of cables, but they used to connect your MIDI controller to another device or interface.
MIDI Mergers
If you plan on playing with other people, then you may want to check out MIDI mergers. MIDI Mergers allow multiple players to create music together, even if they use different MIDI controllers. All you have to do is plug in the controllers, and it will all go to one interface, which makes the recording process more straightforward.
Channel Number
Now that you know about MIDI mergers let’s talk about channels. Channels are essential for MIDI sequencing, it’s where the MIDI data is recorded like a multitrack audio recording. So, instead of having multiple instruments playing the same notes at the same time, you can send different sounds over several channels. There are usually 16 MIDI channels in total.
For example, if you have an instrument that creates a great sound, and another that makes a different (but equally great) sound, you could set the first one to channel 1. Then, you can set the second sound to channel 2, and so on.
Some controllers can transmit the data over multiple channels. A good example would be a MIDI guitar. It has one channel for each string, so the bottom two strings can play a different sound than the upper four.
Channels are a must-have for multitimbral hardware and other virtual instruments that can playback multiple sounds simultaneously.
Controller Message Numbers
Controller messages numbers prevent the tone generator from becoming confused. It assigns numbers to parameters. That way, it won’t control volume when you want it to control the vibrato. The most common standard default for controller message numbers look something like this:
- Vibrato- 1
- Volume- 7
- Foot pedal- 4
- Sustain pedal- 64
Note: You’re not required to use the standard default, you can choose to assign a specific parameter (like volume) to a different number. You can use MIDI mapping to make the changes.
What Is MIDI Mapping?
So, what is a MIDI map? MIDI mapping allows you to connect an instrument or controller to the computer (like a MIDI keyboard) and adjust the functions. In other words, it gives people a way to adjust music without staring at a computer screen.
With MIDI mapping, you can choose what button or knob will control inside the software. You can even set your own set of custom controls that are unique to your music workflow.
For instance, if you want to focus on mixer controls, then you can set your MIDI map to manage the track volume and panning. If you prefer to focus on controlling virtual instruments’ parameters, you can set your MIDI map to control these.
How to Set Up MIDI Mapping
Some people prefer to use MIDI with built-in mapping features. Or they may use software that’s capable of automatically setting all the controls on your MIDI controllers. If you want to try and set up MIDI mapping, here are the basic steps:
- Connect your MIDI controller to your computer
- Adjust your preference settings
- Switch on the MIDI Map Mode
- Pick a parameter you want to adjust
- Attach the MIDI mapping to the parameter
- Test the mapping
- Save your MIDI mapping
Connect The MIDI Controller
You’ll need to connect the controller to the computer. If it comes with a USB, you can insert the USB into the computer’s port, and it’ll be ready to go. In some cases, you may use an audio interface, which acts as a hub between the computer and the controller.
Check out this short video from Ableton on MIDI controllers.
The audio interface is mainly used for connecting an instrument or microphone to a computer, but it can function as an external sound card.
I have written an article on how to get started with an audio interface. You can read it here.
A simple way to get started is with the incredible Focusrite Scarlett 2i2. This Interface also has phantom power built-in and is a very popular choice.
You can learn all about phantom power and preamps here.
If you are unsure what phantom power is you can read my article here
Adjust Your Preferences
The computer program (like Ableton) has a preference menu that can be adjusted. For Mac, you can usually find it inside the live menu, and for windows, it’ll be in the options menu. Once you find the preference menu, go to the “Link Midi” and click on it.
Then, look for the section on MIDI ports. If your MIDI controller is connected, it will show up as an input and output. Go ahead and turn on Track and Remote for both of them. This only needs to be done once. Now your controller is ready for MIDI mapping.
Switch On The MIDI Map Mode
You’ll need to activate the MIDI map mode inside the software (Ableton, etc.). Once it is turned on, you can start mapping your controller.
You can do this by finding the MIDI Map mode switch, it’s usually in the top menu bar. It may be labeled “MIDI.” Once you click this button, you’ll get an indicator that it’s in mapping mode, and the software is waiting for you to begin mapping.
Choose The Parameters
When the mapping mode is switched on, you can click on a parameter you want to map, and it will either change color or have a border appear around it. For example, in Ableton, many things will turn blue when the mapping mode is turned on. That means anything blue can be selected for mapping.
Attach The Mapping To Controller
Now you’re ready to attach the mapping to your physical controller.
You can do this by selecting the parameter (the highlighted area) on the interface and then moving the button/knob or fader on the controller. When you touch and move it, the software will link it, and you’ll see an indicator appear on the screen. This means the mapping has been attached to the parameter on the controller.
Test It Out
To make sure your controller was mapped, turn off the mapping mode and move the button/knob or fader on the controller.
You should see the parameter move inside the software as you are moving the button/knob or fader on the controller. If you don’t see anything change inside the software as you are adjusting the controls on the controller, try again.
If you’re still having trouble mapping, it may be helpful to review the instructions for the software you are using. Ableton is a popular choice among many MIDI users, but there are other programs as well, and their mapping options may vary.
Save Your MIDI Mapping
Most software and digital interfaces make it easy to save your mapping. All you have to do is click “save.” However, saving your MIDI mapping may cause you to re-map each time you open a new project. It depends on the software you are using.
A good way to save your mapping without starting over is to save the current settings as your default. This way, the settings will remain the same each time you open a new project. Or you can check out control surface scripts, also called remote scripts. They’re a live built-in mapping feature. Think of them as a brain for your MIDI controller.
Managing Your MIDI Mappings
Once you’ve established your mapping, you should be able to pull up a list or browser that illustrates all the created mappings. You can use this section to delete or tweak a particular mapping.
You can adjust the track activator buttons within the mapping to turn the mute button on or off. You can also change the min and max percentage value of the device parameter. For example, you could tell the software to turn the control parameter to 75% when the actual knob or button on your MIDI is turned up all the way.

What Are Virtual Instruments?
Like the name says, the instruments are virtual, not physical. They exist inside a digital interface, but the sounds they create are similar to the real instruments. It may be best to think of them as software instruments that can only be played with MIDI.
Digital Audio Workstation
If you plan on using MIDI for virtual instruments, you’ll want to get a Digital Audio Workstation (DAW). You can’t control virtual instruments without one. DAW is an electronic device or software used for recording and producing audio files. They can also be used for editing. All DAW has four components:
- A computer
- Sound card
- Audio Editing software
- Interface
DAW can be a simple software program on a computer or a complex system of multiple components linked to one central computing station. Either way, they all have a central interface with features that will allow you to alter and mix music tracks.
The DAW interface is capable of playing a wide variety of synth and string music. You can record and add different music sounds to individual buttons or knobs, and then press them each time you want the sound to be played.
MIDI Sequencing
A sequencer is a device or software where audio data is stored as a sequence of events. Users often use sequencing for adjusting and producing music tracks. Some software has different sets of sequencers to create unique sounds and patterns. A good example is the step sequencer feature, where a series of notes goes through a repetitive loop.
Note: All DAWs are sequencers.
Midi Language
As you read and learn about MIDI, you’ll come across several keywords. It would be a good idea to become familiar with them. Let’s go over the most common ones.
- Pitch Bend- Wheels or levers that you can move back and forth to change the pitch.
- Modulation- Another wheel or lever where you can add vibrato. You can also open or close a filter and change a processor’s sound effect.
- Pressure/Aftertouch- When the keys of the instruments are pressed, the pressure data is sent to the generator. Aftertouch can create individual pressure data for each note that’s pressed, even if they’re all pressed at the same time.
- Foot pedal- The foot pedal can be used to control a particular parameter. Usually, it’s for volume, but it can be used for a different parameter (use MIDI mapping to set it to the parameter you want).
- Sustain pedal- It’s similar to the foot pedal, but it’s mainly for sustaining the notes, which makes them sound for a longer period of time (without you having to hold your finger down).
- Breath controller- This will allow you to blow air like you were playing a wind instrument like a flute, and it will create a MIDI data.
- Ribbon controller- It’s a strip on a MIDI controller that allows you to control pitch and filters by running your finger across the surface.
- DAW- A Digital Audio Workstation. It’s an interface that will allow you to control music parameters.
- Control surface- A hardware device that helps you manage the functions of the MIDI software. So, if you move a knob or fader, the control surface will create MIDI data that the software will understand. Then, the software writes the data onto the automation track.
- Knobs and Faders- Buttons and knobs that give users a hands-on approach to controlling the music sound and parameters.
- Multitimbral- Capable of creating more than one type of timbre (sound) at a time. For example, a 16-multitimbral can create 16 different sounds at the same time.
Here’s a crash course on understanding MIDI language.
MIDI Learning Aid
Manufacturers behind some MIDI products know that it takes time for people to become experts, so they installed “MIDI Learn” to make things easier. You can access this option on virtual instruments if you right-click on the software control. If that doesn’t work, pull up a menu that is associated with hardware control.
When you select MIDI Learn, the new parameters will wait until you move the hardware controller you aim to use, like a foot pedal. If you want to reverse the action, then simply click on “MIDI Forget.”
Tips for Newbies
The best thing you could do is to play with it and learn how it works. If you find yourself becoming overwhelmed, take a step back and start with a simple MIDI controller (like a keyboard). Then, you can try and play with a different controller. As you become accustomed to different controllers, you’ll develop a better understanding of how MIDI works.
Final Words
There are several tutorials available. Some of them may come with controller devices. Or, you can find tutorial videos online. It may also be helpful to join a MIDI group to gain insight from MIDI experts. They may be able to answer your questions and guide you through the process.
Most of all remember to enjoy your midi learning experience and have fun!