
Hearing aids require regular maintenance to ensure that they continue to work optimally and maximize their lifespan. Keeping your hearing aids clean is an important part of this maintenance process.
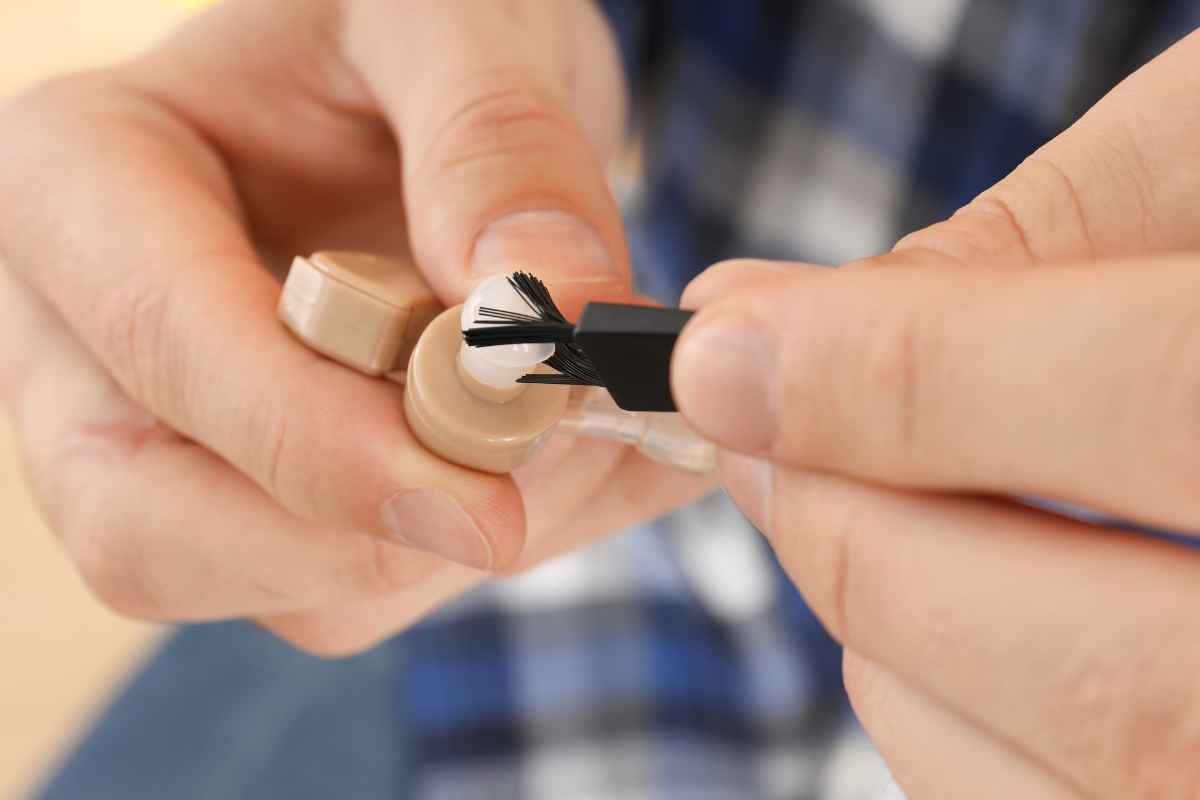
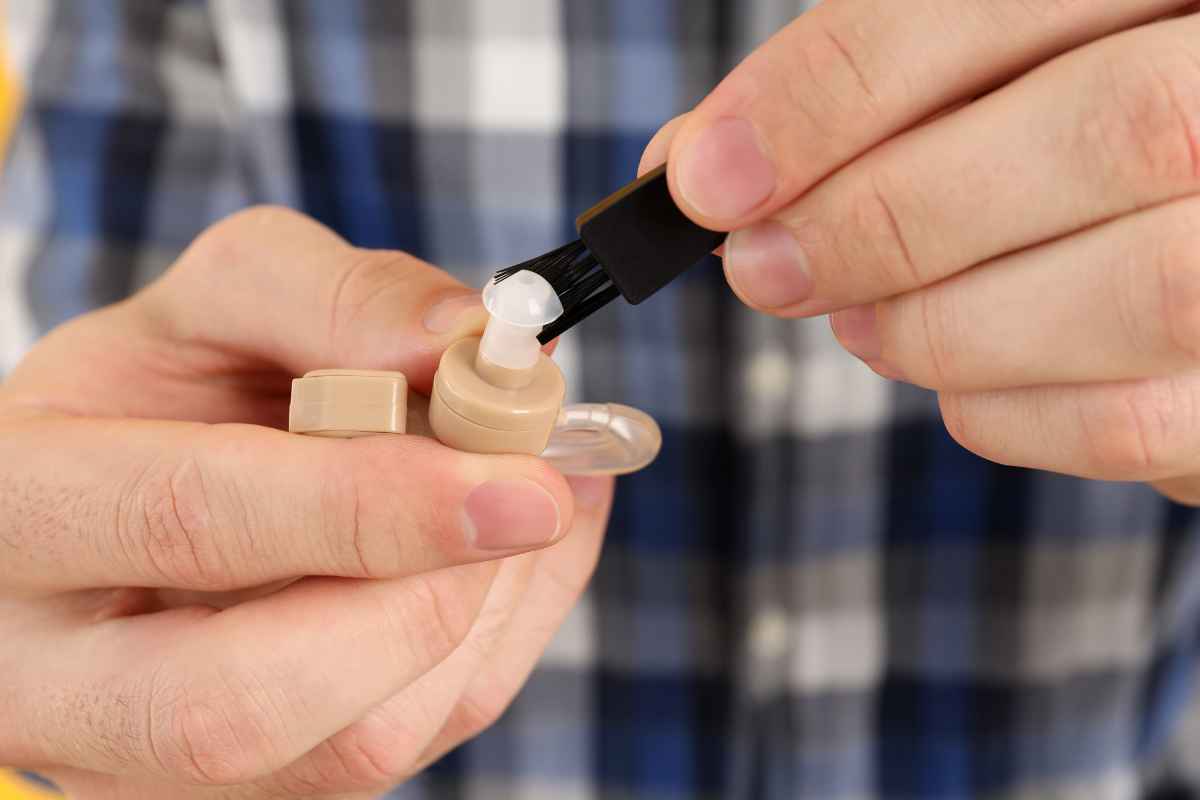
To clean your hearing aids, remove the earmold and battery, then use a soft-bristled, dry brush to gently brush away any visible build-up on both components. Before reassembling your hearing aid, soak the earmold in lukewarm soapy water for five minutes, then rinse it before drying and reassembling.
There are many important things to consider when cleaning your hearing aids. Be sure to take necessary precautions to avoid causing damage to the device.
In this article, we’ll go over the best practices for cleaning hearing aids and their components, providing tips to help you get started with the process.
How to Clean Hearing Aids
It’s important to take care when cleaning and maintaining your hearing aids, as this will help them to function properly and last for a long time. Here are the steps you need to follow to ensure they’re thoroughly cleaned and avoid damaging them.
Here’s what you’ll need:
- A soft, lint-free cloth
- Cleaning tool/pick (should be provided with a hearing aid)
- Hearing aid cleaning spray or mild soap solution
- Lukewarm water
1. Start by removing the battery from the hearing aid and wiping it down with a damp cloth. Ensure no moisture gets on the microphone or sound outlet, as this could cause damage.
2. Use the hearing aid cleaning pick/tool (which should come with your device) to remove any wax or debris from the sound outlet, microphone, and ear mold. Don’t use anything sharp like a needle, as this can damage the hearing aid.
3. Dip a soft, lint-free cloth in a mild soap solution or hearing aid cleaning spray and wipe down the exterior of the device.
4. Rinse off any soap residue with lukewarm water, making sure no moisture gets on the microphone or sound outlet.
5. Dry off the hearing aid with a soft cloth, paying extra attention to the microphone and sound outlet.
6. Use the cleaning pick/tool to clean out any excess wax or debris from the ear mold, and then replace it on to the hearing aid.
7. Replace the battery in its compartment, ensuring it’s properly secured.
8. Test the hearing aid by turning it on and listening for any static noises or feedback.
Provided you follow the steps outlined above, your hearing aid should be clean and functioning correctly.

How Often Should You Clean Hearing Aids?
It’s important to make sure you clean your hearing aids regularly to maintain their proper functioning. Generally, it’s recommended that you clean them once or twice a week – although this may need to be more frequent if they’re exposed to more moisture or debris.
You should also take your device for regular check-ups with an audiologist, who can make sure everything is in working order and that you’re using your hearing aid correctly. This should be done at least once a year or more frequently if your audiologist advises.
It’s also advised to replace the batteries regularly – usually every few weeks – and make sure they are securely fastened within the device.
If you take your hearing aids out, ensure that they are stored in their protective case to prevent them from getting damaged. This will also prevent dirt and debris from entering the device when not in use.
Why Does My Hearing Aid Sound Muffled?
A hearing aid should sound clear and crisp. However, after some time of use, you may notice that it is beginning to sound muffled. This can occur for several potential reasons.
Poor sound quality is usually caused by a build-up of wax and debris in the tubing or on the microphone and receiver openings. If left unchecked, this can cause feedback issues or even damage the hearing aid itself.
You can usually see the build-up on the tubing of your hearing aid, but it can also accumulate within small crevices and openings. To prevent this build-up from occurring, you should clean your hearing aids on a regular basis.
Furthermore, drained batteries are a common cause of the muffled sound. If your hearing aids lack clarity, check to see if the batteries need replacing.
Humidity and moisture can also affect the performance of your hearing aid. If you live in a humid or rainy place or have recently been swimming or showering with your hearing aids on, this could be the reason for the issues with the sound.
Regular and proper maintenance is the best preventative measure you can take against muffled sound and other hearing aid issues.
How Long Do Hearing Aids Last?
Your hearing aids should last anywhere between three and seven years, although they can last longer. Various factors can impact the lifespan:
- How well the hearing aids are made
- How well you maintain your hearing aids
- How much wear and tear the hearing aids are subjected to – for instance, wearing them for hours in a dusty environment will have a negative impact
It’s vital that you clean and maintain your hearing aids regularly in order to keep them functioning properly. This includes wiping them down with a soft, dry cloth after each use and avoiding water exposure.
Additionally, form the habit of checking the battery door seals for signs of wear or damage. If you notice any tears or cracks in the seals, replace them as soon as possible to ensure your hearing aid is not getting moisture inside.
Some hearing aids are more fragile than others, so it’s important to use the cleaning instructions that came with your device and only use approved cleaning solutions for your specific type of hearing aid.
It’s also a good idea to get in the habit of replacing all earwax filters every six months or so to ensure that they don’t become clogged.
Finally, it’s very important to keep your hearing aid safely stored in a dry place when not in use. This will help protect them from dust and moisture, which can cause damage over time.
By following these steps, you can lengthen the life of your hearing aids and ensure that they continue to function properly.
Final Thoughts
On the whole, cleaning your hearing aids is one of the most important steps to ensure they stay in top shape and remain hygienic. It’s also incredibly simple – all it takes is a few minutes each day and a more thorough clean periodically.
You should have been given clear cleaning instructions and maintenance advice from your audiologist, along with the necessary equipment.
Hearing aids are expensive and vulnerable to damage due to their electronic design. With regular cleaning and maintenance, they’ll last longer. Furthermore, since they sit directly in your ear canal, it’s important to keep them clean to avoid infection.
Related Questions
How should you dry a hearing aid?
If your hearing aid has accidentally gotten wet, or you’ve washed it, and there is excess moisture left on the device, you should take care when drying it. Use a soft, dry cloth to wipe the device gently, then leave it for 24 hours in a warm room until fully dry.
How do I clean the wax out of my hearing aid?
Wax is usually quite easy to wipe off your hearing aid with a soft cloth or brush, but if you’re finding it difficult to remove, you may need to use a pick to scrape it off the device.
Why do hearing aid tubes get hard?
Hearing aid tubes can harden over time because they get exposed to moisture or temperature changes. This can eventually lead to the tubes cracking or becoming misshapen, and they, therefore, need replacing periodically.